Showing posts with label Walton. Show all posts

Tuesday, January 27, 2015

There are many benefits of rooting your Android device. It unlocks many features that were earlier blocked and allows you to run apps that require root access. It allows the users to get full access of your devices and make you a advanced user.
Note: Apply at your own risk. It may void your warranty if you root your phone. We aren't responsible for any kind of damage of your phone. However, if you successfully root your Walton Primo RX2. Then you will enjoy it.
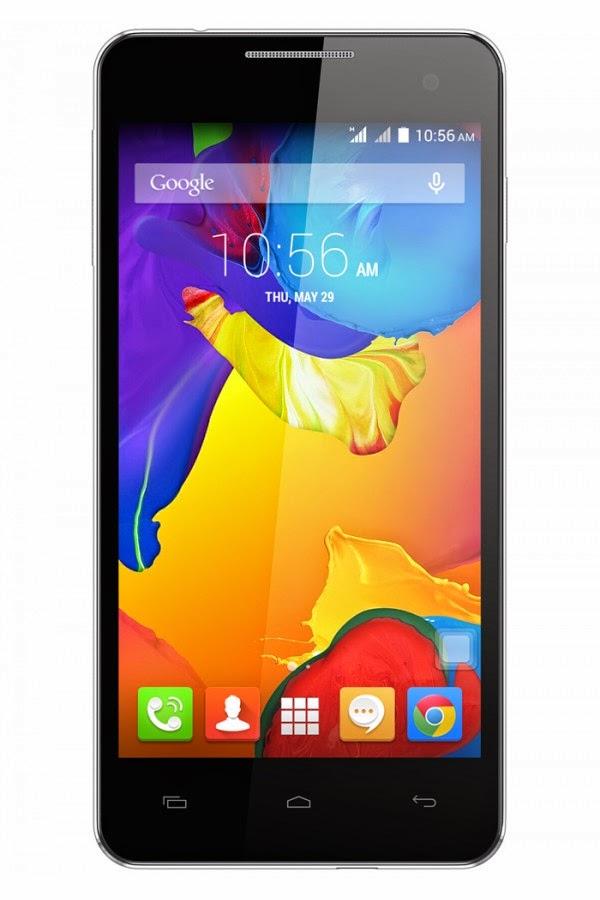
Here in this article you will learn the best method to root your Walton Primo RX2. After rooting your Walton Primo RX2 you will be able to maximize battery life, install custom ROMs, Partition your SD card to use SWAP and Update your Android OS any many more.
Rooting the Walton Primo RX2

Necessary Downloads

Now Rooting the Walton Primo RX2

  1. Enable USB Debugging on your device. To do this, go to Settings > Application > Development and then check the USB Debugging tickbox.
  2. Download and install the drivers.
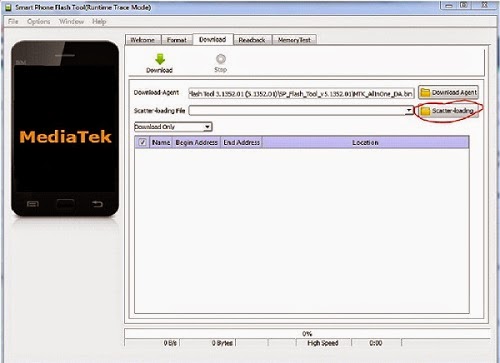
  3. Open SP Flash Tools and click Scatter Loading, Than select Scatter file from your device.
  4. Rooting the Walton Primo RX2
  5. Click RECOVERY from the list. A new window will appear, Than select your downloaded recovery image that you want to flash. Click download at the top of SPFT
  6. Rooting the Walton Primo RX2
  7. TURN OFF your phone and remove the battery from your phone. After that, connect your switched OFF phone to your computer via USB Cable.
  8. You will see a green circle indicating it’s finished successfully.
  9. Rooting the Walton Primo RX2
  10. Now disconnect your phone to PC. Than TURN ON your phone and copy the SuperSU zip file you downloaded earlier to anywhere on your phones SDCARD.
  11. Power off your Primo RX2 then hold down Volume Up, and Power buttons together.
  12. Once in CWM Recovery, choose “install zip from sdcard” and hit the Power button.
  13. Choose “choose zip from sdcard” and hit the Power button.
  14. Browse and find the SuperSU zip file you copied over earlier and hit the Power button.
  15. Choose “Yes” and hit the Power button.
  16. This will install su binaries and SuperSU superuser app on your phone.
  17. Go back to main menu and choose "reboot system now"
Done, your phone is rooted successfully, now you will find SuperSU on App Drawer. Enjoy!
If you want to check that your phone is rooted or not then you have to download this Root Checker application and verify it yourself.

Tuesday, February 11, 2014

There are many benefits of rooting your Android device. It unlocks many features that were earlier blocked and allows you to run apps that require root access. It allows the users to get full access of your devices and make you a advanced user.
Note: Apply at your own risk. It may void your warranty if you root your phone. We aren't responsible for any kind of damage of your phone. However, if you successfully root your Walton Primo E2. Then you will enjoy it.
Here in this article you will learn the best method to root your Walton Primo E2. After rooting your Walton Primo E2 you will be able to maximize battery life, install custom ROMs, Partition your SD card to use SWAP and Update your Android OS any many more.

Rooting the Walton Primo E2

Necessary Downloads

Now Rooting the Walton Primo E2

  1. Download and Install the Framaroot APK
  2. Once the Framaroot been installed, launch it from your App Drawer.
  3. Select Install SuperSU from the first dropdown menu.
  4. As for selecting the exploit, For MTK devices select Boromir, Barahir or Faramir (If it says Failed ... Try another exploit if available). tap on it in the app.
  5. The app should begin rooting your device, shouldn’t take too long to finish.
  6. Reboot your device once it’s been rooted.
  7. You’re all done!
Done, your phone is rooted successfully, now you will find SuperSU on App Drawer. Enjoy!

If you want to check that your phone is rooted or not then you have to download this Root Checker application and verify it yourself.

Sunday, January 26, 2014

After the great success of Walton Primo X2 they have Announced Walton Primo ZX. It’s an awesome phone with some great features like 5.5 IPS FHD Capacitive touch screen with 16.7 M colors, Android Jelly Bean 4.3 operating system, 2.26 GHz Quad Core Processor, 3 GB RAM, 32 GB ROM, 16 Megapixel rear camera, 8 Megapixel front camera and 2500 mAh non-removable strong battery.


Walton Primo ZX Full Specifications
GENERAL
2G Network
GSM 850 / 900 / 1800 / 1900
3G Network
UMTS 900/1800/2100 MHz
SIM
Micro SIM
Announced
January, 2014
Status
Coming soon...Exp. release 2014, March
Price
Exp. price 30,000 BDT Only Available in Bangladesh
BODY
Dimensions
150.6 x 75.0 x 9.5 mm
Weight
n/a
DISPLA
Type
IPS FHD Capacitive touchscreen with 16.7 M colors
Size
5.5 inches with (1920x1080) pixels
Multitouch
Yes, up to 10 Fingers
Protection
Yes, Gorilla Glass v3
SOUND
Alert
Vibration, MP3 ringtones
Speaker
Yes
3.5mm jack
Yes
MEMORY
Internal
ROM 32 GB, RAM 3 GB
Card slot
microSD, up to 32 GB
DATA
GPRS
Yes
EDGE
Yes
Speed
GPRS / EDGE/ 3G / 4G / HSPA+
WLAN
802.11, Wi-Fi Hotspot
Bluetooth
Yes, v4.0 with A2 DPR
USB
Yes, microUSB v2.0 with OTG
CAMERA
Primary
16 MP with (4128x3096) pixels
Features
Geo tagging, Face and Smile detection, panorama, HDR, BSI Sensors, Blue Glass v3, f/2.2 aperture, CMOS sensors, LED Flash, Dual LED auto focus
Video
Yes, 1080p Full HD
Secondary
Yes, 8 MP with 1080p Video recording
OTHER FEATURES
OS
Android OS, v4.2.2 (Jelly Bean)
Chipset
Qualcomm Snapdragon 800
CPU
2.26 GHz Quad-Core Cortex A-7
GPU
Adreno 330
Sensors
Accelerometer(3D), Orientation, Gyro, Proximity, Compass, Light sensor
Messaging
SMS(Threaded view), MMS, E-mail
Browser
HTML 5
Radio
FM Radio
GPS
Yes, A-GPS support with GLONASS
Java
Yes, via Java MIDP emulator
Color
Black, White
BATTERY
Capacity
2500 mAh
Technology
Li-ion non-removable strong battery
Disclaimer: We can not guarantee that the information on
this page is 100% correct.We mostly collect info through
manufacturers official website and well reputed sources
from internet.

Friday, January 10, 2014

There are many benefits of rooting your Android device. It unlocks many features that were earlier blocked and allows you to run apps that require root access. It allows the users to get full access of your devices and make you a advanced user.
Note: Apply at your own risk. It may void your warranty if you root your phone. We aren't responsible for any kind of damage of your phone. However, if you successfully root your H2 then you will enjoy it.Here in this article you will learn the best method to root your H2After rooting your H2 you will be able to maximize battery life, install custom ROMs, Partition your SD card to use SWAP and Update your Android OS any many more.

Before You Proceed:

  •  There have been problems reported while running the tool used in this guide on Windows XP, so make sure you have a Windows 7-8 based PC.
  •  Make sure you have the necessary drivers installed before you begin.  If you are unsure about this, check the next section to download and install the proper drivers.
  • Enable USB Debugging mode. Go to Options > Applications > Development > USB Debugging.
  • Battery should be full.

Necessary Downloads

Now Rooting the Walton Primo H2

1. Enable USB Debugging on your device.  To do this,  go to Settings > Application > Development and then check the USB Debugging tickbox.

2. Connect your device to the PC using a microUSB cable.  Windows should install the drivers at this stage if it hasn’t done so already.
3. Double-click on WaltonRooter you downloaded above.
4. Tap on Next button.

5. Tap on Next button.

6. Tap on Next button.

7. Tap on Next button

8. Click Verify Device Connectivity. If device status does online than tap on Next button.

9. Tap on Root button

10. After clicking the Root button the tool should automatically begin rooting your Device. 


Done, your phone is rooted successfully, now you will find SuperSU on phone menu. Enjoy!!!!!

If you want to check that your phone is rooted or not then you have to download this Root Checker application and verify it yourself.

Friday, October 25, 2013

There are many benefits of rooting your Android device. It unlocks many features that were earlier blocked and allows you to run apps that require root access. It allows the users to get full access of your devices and make you a advanced user.
Note: Apply at your own risk. It may void your warranty if you root your phone. We aren't responsible for any kind of damage of your phone. However, if you successfully root your Walton Primo F1 then you will enjoy it.
Here in this article you will learn the best method to root your Walton Primo F1
After rooting your Primo F1 you will be able to maximize battery life, install custom ROMs, Partition your SD card to use SWAP and Update your Android OS any many more.

Necessary Downloads

1. Download Root with Restore by Bin4ry v3 from here
2. Walton Primo F1 USB Drivers.

Now Rooting the Primo F1

Step 1: Connect your handset with usb cable to pc
Step 2: Enable USB Debugging on your device.  To do this,  go to Settings > Application > Development and then check the USB Debugging tickbox.
Step 3: unzip & Open RunMe.bat file from Bin4ry.
Step 4: Select device type normal 1 and press enter
Step 5: Look at your phone and select Restore

Done, your phone is rooted successfully, now you will find SuperSU on phone menu. Enjoy!!!!!

Now UnRooting the Primo F1

Step 1: Connect your handset with usb cable to pc
Step 2: Enable USB Debugging on your device.  To do this,  go to Settings > Application > Development and then check the USB Debugging tickbox.
Step 3: unzip & Open RunMe.bat file from Bin4ry.
Step 4: Select device type x and press enter, press y then Enter
Step 5: Please restart your phone manually

Done, your phone is unrooted successfully, now there is no SuperSU apps on phone menu. Enjoy!!!!!

If you want to check that your phone is rooted or not then you have to download this Root Checker application and verify it yourself.

Thursday, September 12, 2013

There are many benefits of rooting your Android device as it unlocks many features that were earlier blocked and allows you to run apps that require root access. It allows the users to get full access to their devices and make global changes. Here in this article you will learn the best method to root your Walton Primo X1
Note: Apply at your own risk. It may void your warranty if you root your phone. We aren't responsible for any kind of damage of your phone.

Before You Proceed:

  •  There have been problems reported while running the tool used in this guide on Windows XP, so make sure you have a Windows 7-8 based PC.
  •  Make sure you have the necessary drivers installed before you begin.  If you are unsure about this, check the next section to download and install the proper drivers.
  • Enable USB Debugging mode. Go to Options > Applications > Development > USB Debugging.
  • Battery should be full.

Necessary Downloads

Now Rooting the Walton Primo X1

1. Enable USB Debugging on your device.  To do this,  go to Settings > Application > Development and then check the USB Debugging tickbox.

2. Connect your device to the PC using a microUSB cable.  Windows should install the drivers at this stage if it hasn’t done so already.
3. Double-click on WaltonRooter you downloaded above.
4. Tap on Next button.

5. Tap on Next button.

6. Tap on Next button.

7. Tap on Next button

8. Click Verify Device Connectivity. If device status does online than tap on Next button.

9. Tap on Root button

10. After clicking the Root button the tool should automatically begin rooting your Device. 


Done, your phone is rooted successfully, now you will find SuperSU on phone menu. Enjoy!!!!!

If you want to check that your phone is rooted or not then you have to download this Root Checker application and verify it yourself.


Monday, September 9, 2013

I am using this phone more than 6 months without any bugs. It's an awesome phone. I'd rooted and unrooted this phone more than 10 times. Here this article I gonna show you my own experience. It's is very easy.
Note: Apply at your own risk. It may void your warranty if you root your phone. We aren't responsible for any kind of damage of your phone.
However, if you successfully root your device then you will enjoy it. After rooting your Walton Primo R1 you will be able to maximize battery life, install custom ROMs, Partition your SD card to use SWAP and Update your Android OS any many more.

Necessary Downloads

1. Download Root with Restore by Bin4ry v3 from here
2. Walton Primo R1 USB Drivers.

 Now Rooting the Primo R1

Step 1: Connect your handset with usb cable to pc
Step 2: Enable USB Debugging on your device.  To do this,  go to Settings > Application > Development and then check the USB Debugging tickbox.
Step 3: unzip & Open RunMe.bat file from Bin4ry.
Step4: Select device type normal 1 and press enter
Step5: Look at your phone and select Restore

Done, your phone is rooted successfully, now you will find SuperSU on phone menu. Enjoy!!!!!

Now UnRooting the Primo R1

Step 1: Connect your handset with usb cable to pc
Step 2: Enable USB Debugging on your device.  To do this,  go to Settings > Application > Development and then check the USB Debugging tickbox.
Step 3: unzip & Open RunMe.bat file from Bin4ry.
Step 4: Select device type x and press enter, press y then Enter
Step 5: Please restart your phone manually

Done, your phone is unrooted successfully, now there is no SuperSU apps on phone menu. Enjoy!!!!!

If you want to check that your phone is rooted or not then you have to download this Root Checker application and verify it yourself.